Your gaming laptop hits 95 °C, the fans sound like a jet taking off, and the frame rate drops from 120 to 48 in the middle of a match. You didn't change any settings. Nothing is broken. What happened is that the cooling system stopped being able to move heat away from the CPU and GPU as fast as they produce it — and everything after that is physics, not bad luck.
I repair and tune gaming laptops on the side, mostly for friends and friends-of-friends who show up with a machine that "suddenly got loud." In roughly seven out of ten cases, the fix costs nothing and takes twenty minutes. In the other three, it costs between €10 and €40 in parts. Almost nobody needs a new laptop.
Key Takeaways
- Most gaming laptop heat problems come from dust-clogged heatsinks and dried thermal paste, not from the hardware being too weak.
- 90 °C on the CPU under load is warm but normal for thin gaming laptops; 95–100 °C with clock throttling is where you should act.
- RAM has essentially no impact on how hot a laptop runs — 32 GB does not make it hotter or cooler.
- Elevating the rear of the chassis can drop temperatures by several degrees for free; a cooling pad helps less than most people expect.
- Undervolting and a modest power-limit reduction often recover more performance than they cost, because the chip stops throttling.
Why your gaming laptop overheats when gaming — and what to fix first
Heat in a laptop has only one exit: air pulled in through the bottom, pushed across a fin stack, and blown out the back or sides. Every component in that chain can degrade, and each one degrades in a different way.
The four things that actually cause the problem
- Dust matting in the heatsink fins. This is the big one. After 12–18 months of use, the fins turn into felt. Airflow drops, temperatures climb 8–15 °C, and the fans spin harder to compensate — which is why the machine gets loud before it gets slow.
- Dried thermal paste. Factory paste is decent but not eternal. After two or three years it hardens and pumps out from under the die, leaving gaps.
- An aggressive power profile. Many laptops ship with the CPU allowed to pull far more wattage than the cooling assembly can dissipate in a sustained session.
- Blocked intake. A lap, a bedsheet, a soft carry case left underneath. Sounds obvious until you watch someone actually do it.
How to tell which one you have
Install a monitoring tool — HWiNFO64 and MSI Afterburner are both free — and log CPU package temperature, GPU temperature, and clock speed while you play for twenty minutes. Then read the pattern:
| Symptom pattern | Most likely cause | Typical fix |
|---|---|---|
| Hot and loud from day one, no gradual decline | Power limits set too high for the chassis | Undervolt, cap PL1/PL2, custom fan curve |
| Got progressively worse over a year | Dust buildup | Open it, clean the fins and fans |
| Hot after 2+ years, fans clean | Thermal paste degradation | Repaste with a quality non-conductive paste |
| Runs hot only on soft surfaces | Blocked intake | Hard flat surface, raise the rear |
The order matters. Cleaning before repasting, and repasting before touching software. I once spent an evening tuning fan curves on a laptop that turned out to have a dust felt mat thick enough to peel off in one piece. Software cannot fix a physical blockage.
How to fix overheating while gaming, step by step
Work through these in order. Stop when temperatures are where you want them.

Step 1: clean the cooling system properly
- Power off, unplug, and if the battery is internal and accessible, disconnect it.
- Remove the bottom panel. Keep the screws in a cup, in the order you removed them — some are different lengths and the wrong one will punch through the chassis.
- Hold the fans still with a finger or a plastic tool and blow compressed air through the fins from the outside in, so dust exits the way it came. Spinning a fan with air can overspeed it and damage the bearing.
- Use a soft brush or cotton swab on the fin stacks. If the dust has become a solid mat, tweezers first, air second.
- Reassemble, boot, and log temperatures again before changing anything else.
On my own 15-inch machine, a full clean dropped CPU temperature under sustained load from 94 °C to 86 °C. That single step bought back about 10 FPS in a CPU-heavy title, because the chip stopped hitting its thermal limit and downclocking.
Step 2: repaste if the machine is two years old or older
Use a non-conductive paste — standard silicone-based compounds are fine, liquid metal is not worth the risk on a laptop you actually carry around. Clean the old paste off the die and the cold plate with isopropyl alcohol and a lint-free cloth. Apply a thin, even layer or a small central dot, depending on the paste. Screw the heatsink down in a diagonal cross pattern, a little at a time, so pressure stays even.
Honest caveat: repasting is the step where people break things. If your laptop is under warranty, check whether opening it voids coverage. If you're not comfortable, a repair shop will do it for the price of an hour of labour.
Step 3: undervolt and cap the power limits
This is the highest-value software change and the one most people skip. A modest undervolt — often around −50 to −100 mV on the core, tuned by testing — reduces heat output without reducing performance, and frequently increases sustained frame rates because the chip stops throttling.
Use ThrottleStop or Intel XTU on Intel platforms, or the curve optimizer on AMD. Change one value at a time, stress test for ten minutes, and back off if you get a crash or a blue screen. Then set a sustained power limit your chassis can actually cool — many laptops are far happier with the CPU capped than running wide open.
Step 4: fan curves and physical setup
- Set a custom fan curve that ramps earlier and harder than the default "quiet" profile. It's louder. That's the trade.
- Raise the rear of the laptop by 2–3 cm with a stand or a book. This alone typically gains 3–6 °C.
- Always game on a hard, flat surface with clear space behind the exhaust.
- Update the BIOS and GPU drivers. Vendors do ship fan-control and power-delivery fixes that never make it into a changelog you'd read.
What temperatures are actually normal?
This is where most advice goes vague, so let's put numbers on it.

Is 90 °C hot for a CPU while gaming?
No — 90 °C on the CPU under a heavy gaming load is within normal range for a modern thin gaming laptop. Mobile CPUs are rated to run up to roughly 100 °C, and the manufacturer's firmware will throttle before damage occurs. What matters is not the peak number but the behaviour: if the CPU sits at 90–93 °C and holds its clock speed, you're fine. If it spikes to 97–100 °C and the clock drops from 4.2 GHz to 2.8 GHz, that is thermal throttling and it's costing you frames. GPU temperatures are a different story — most laptop GPUs are comfortable in the 70–85 °C range, and anything sustained above about 87 °C deserves attention.
How do I stop my gaming laptop from getting hot?
Keep the intake clear, clean the heatsink fins every 12 months, and stop letting the CPU run at factory power limits the chassis can't handle. In practice that means a hard flat surface, a rear riser, a scheduled dusting, and an undervolt with a capped sustained power limit. Those four measures handle the large majority of cases without opening the machine more than once a year.
Does more RAM make a gaming laptop hotter?
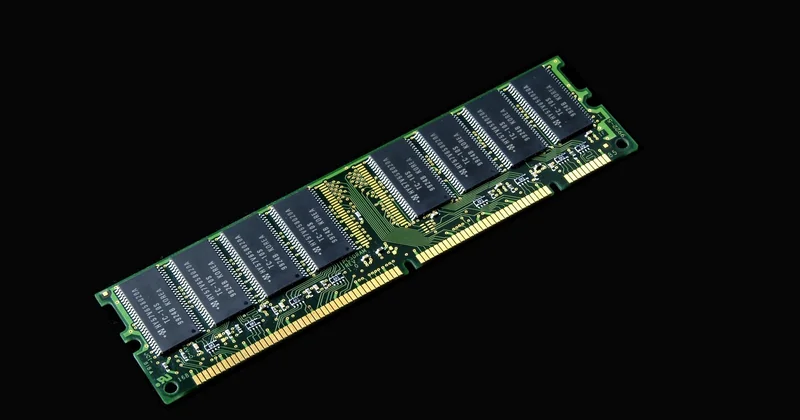
No. This comes up constantly, and the answer is boring: memory modules draw a few watts at most, and their heat output barely registers next to a CPU pulling 45–65 W and a GPU pulling 80–150 W. Adding RAM does not raise system temperatures in any meaningful way.
Is 32GB RAM overkill for a gaming laptop?
For pure gaming today, 16 GB is still enough for the vast majority of titles, and 32 GB is more than you need. It stops being overkill the moment you do anything else alongside gaming — running a browser with dozens of tabs, streaming, editing video, or running a virtual machine. My rule of thumb: if you close applications before launching a game to "free up memory," buy 32 GB. If you never think about it, 16 GB is fine, and the money is better spent on cooling, a bigger SSD, or simply saving it. Either way, this decision has nothing to do with your temperature problem.
Do cooling pads and vacuum coolers actually work?
Partly. Here's the honest comparison, based on what I've measured on my own hardware and on machines I've worked on:
| Solution | Typical temperature effect | Verdict |
|---|---|---|
| Rear riser / simple stand | 3–6 °C cooler | Best value by far — buy this first |
| Cooling pad with large fans | 3–8 °C cooler, highly variable | Worth it on laptops with a big bottom intake; near-useless on sealed bottoms |
| Vacuum cooler ( attaches to the exhaust ) | 4–10 °C cooler but loud | Effective on older thick chassis; can fight the internal fans |
| Repasting with quality paste | 4–10 °C cooler | The real fix once paste has aged |
| Undervolt | 5–12 °C cooler plus better sustained clocks | Free, and the biggest single win on the software side |
Real talk: a €25 cooling pad will not rescue a laptop whose heatsink is packed with dust. Physics does not negotiate. Fix the airflow path first, then consider accessories.
When the fix isn't a fix anymore
Some machines are simply built past their cooling capacity. A 1.8 cm chassis with a 130 W GPU and a 55 W CPU has a thermal budget that no paste, pad or undervolt can fully overcome — you can improve it, but you can't make it quiet and cool and fast at the same time. If you've cleaned, repasted, undervolted, capped the power limit and still throttle hard, the honest move is to accept a lower performance profile or change machines.
Which raises the question worth asking before your next purchase: how thick is the laptop, and how much metal is between the die and the outside air? That specification never appears on the box, and it determines more about your experience than the model number of the GPU ever will. The quietest gaming laptop I've ever used was also the ugliest one — and it never once crossed 80 °C.